How to Change the Number of Products in My Project
When creating a project, you will always be
When
creating a project, you will always be provided with a template that includes a
default number of products. You can view the number of products in your project
on the summary
page each time you open it . If you want to increase or decrease the number
of products being tested, you will need to make changes in the design section.
This article will guide you through the process.
Step 1:
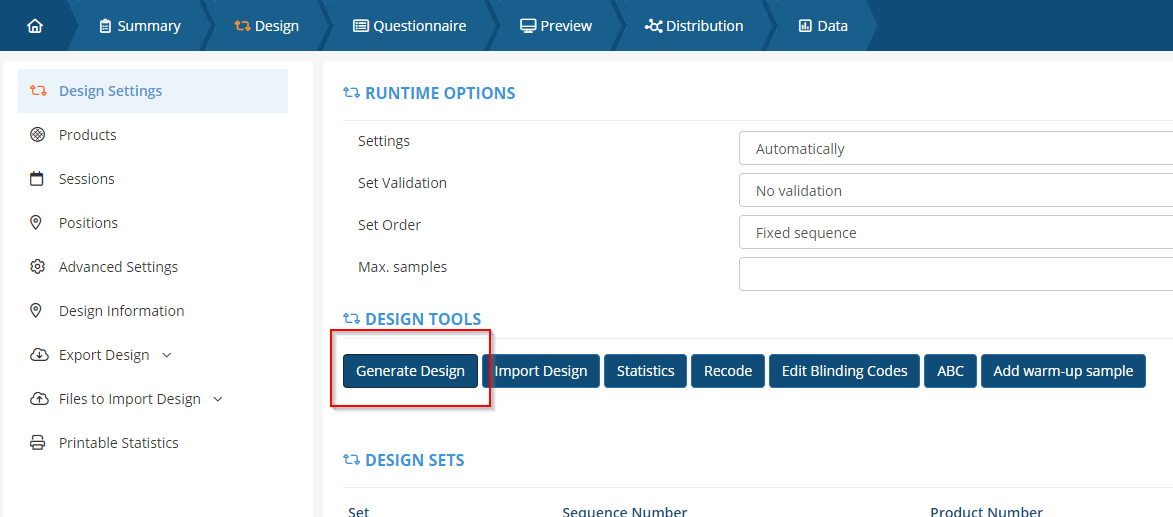
In the Design section of your project, click on Generate Design.
Step 2:
In the pop-up window you will notice, among multiple other options, the Products option with a dropdown tab. In this option you can choose the number of products your questionnaire will contain.
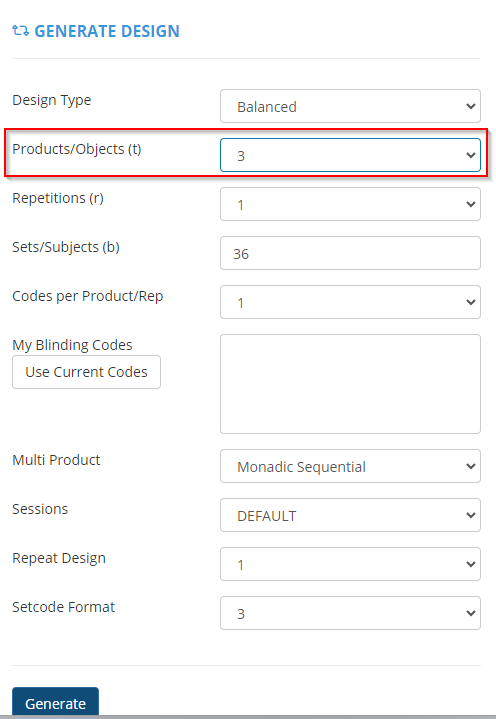
After clicking Generate, your project will be updated with the new set of products.

After clicking Generate, your project will be updated with the new set of products.
Removing one of the products after product information has already been added
Step 1:
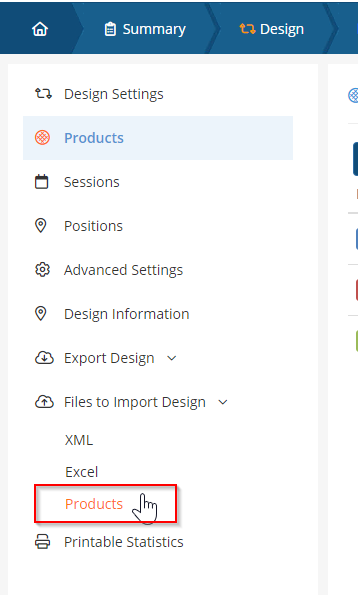
In order to remove one of the products in the sequence without interfering with the other products' information that has already been filled in, you must first Export the Product design file from the Design screen.
Step 2:
Step 2:
Within the generated file, delete the entire row that belongs to the product you want to remove, adjust the value of your products and save the changes.
Step 3:
Generate a design containing the needed number of products. Import the modified file back into the Design>Products>Import Product Properties.