Introduction
The Panellist Portal is a central hub designed to provide your panellists with a clear, user-friendly overview of their activities. From viewing upcoming appointments to completing questionnaires, this space ensures that all participation tasks are managed in one place. The portal increases engagement, streamlines the participation process, and empowers panellists to stay on top of their commitments.
Functionalities
1. My Space (Landing Page)
The My Space page is the first screen a panellist sees when logging into the portal. It gives a quick snapshot of their most important activities:
-
Booked Appointments: Displays the next three appointments that the panellist is scheduled to attend.
-
Available Questionnaires: Shows up to four questionnaires currently assigned to the panellist and ready to be completed.
-
Available Appointments: Lists up to four appointment slots that are open for booking.
2. Available Questionnaires
By clicking on Available Questionnaires, panellists are taken to a full overview of all questionnaires they are eligible to complete.
How Questionnaires Are Shown in the Portal
A questionnaire will appear in the portal if:
-
The panellist has been added to the panel for the project.
-
The project has been deployed.
For each project, the following details are shown:
-
Project Title – The title of the project to which the questionnaire belongs.
-
Project Description – A short description of the project, helping panellists understand the context.
Expiration Date – The end date of the questionnaire, determined by the project’s setup.
3. Appointments
The Appointments section of the Panellist Portal is divided into two parts: Booked Appointments and Available Appointments.
Booked Appointments
This page lists all appointments that the panellist has actively booked. For each booked appointment, the following information is displayed:
-
Project Title – The name of the project.
Project Description – A short description of the project, helping panellists understand the context
-
Date and Time – The exact date and time chosen by the panellist.
Panellists can manage their bookings:
-
By clicking “Change”, they can either reschedule or cancel an appointment.
-
This action redirects them to the appointment booking page, where they can select a new slot or cancel.
Available Appointments
The Available Appointments page shows all projects for which the panellist has been invited to book. Each project tile includes:
-
Project Title
-
Project Description (if included)
-
Test Dates – The date(s) on which the test will take place
-
Time Slots – First and last available slots
-
Location – Where the test will be held
From this page, panellists can:
-
Book an Appointment by clicking the “Book” button and access to the booking page.
-
Rebook Declined/Cancelled Appointments, which remain visible in case they want to choose a new slot.
Once booked, the project automatically moves to the Booked Appointments page.
Important: Panellists will only see projects available for booking if:
From the My Space page, panellists can also access and update their:
- Personal Information – ensuring their personal details (e.g. address, email, phone number) are always current.
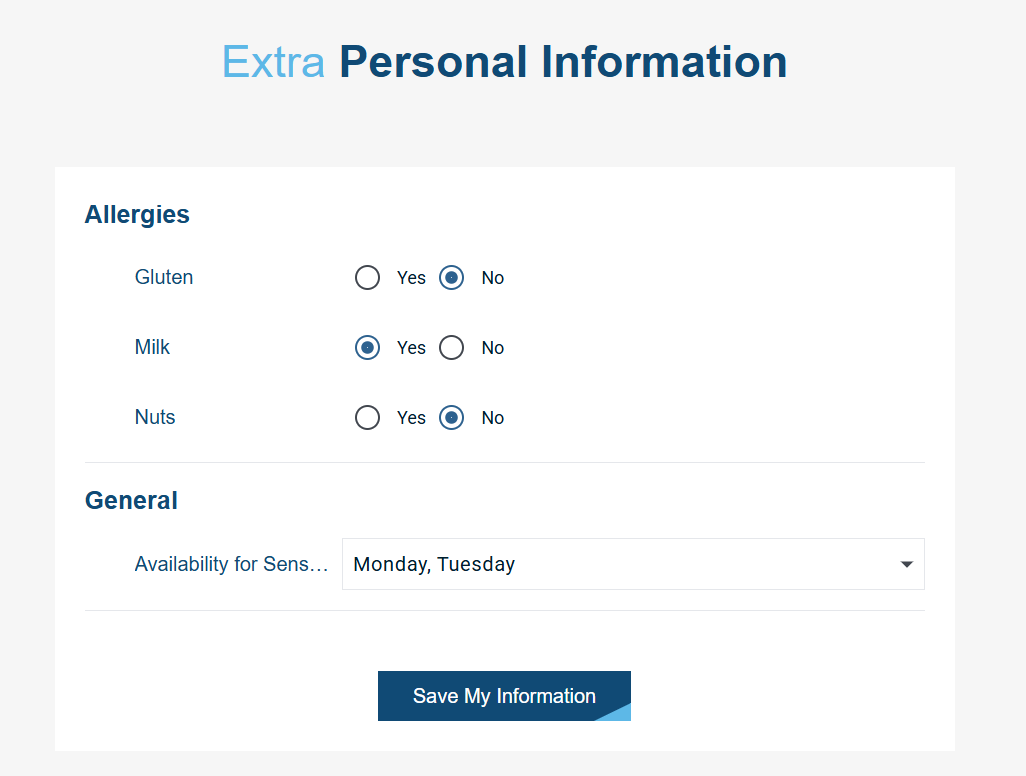
- Extra Personal Information (Categories) – where they can manage category-specific data used for panel management.
How to Show Categories in the Panellist Portal
Panel can configure how categories are displayed in the portal by going to: EyeQuestion > Panel Management > Categories > Select Category
For each category, you can define whether it is:
- Not Shown in the Portal – Hidden from panellists.
- Visible in the Portal – Panellists can see the category and their current answers but cannot change it.
- Editable in the Portal – Panellists can update their category information themselves.
If a category is marked as Editable and panellists have not yet provided an answer, they will be prompted to complete the missing information when logging in. This process ensures that all category details stay accurate and up to date, with panellists actively contributing to the maintenance of their own profiles.
Category Groups
If the categories you want to display in the portal are organized into category groups, these groups will also be reflected in the panellists’ portal. For example, all categories that belong to the group Allergy will appear together under a single group. Categories that are not assigned to any group will be displayed under the General category group, sorted alphabetically.
5. Balance Page
This section displays the Balance Page, where panellists can see the total amount they are still due for the tests they have participated in. When the balance equals zero, it means that all payments for their participation have been completed.
In the overview, panellists can also check:
-
When they were granted a reward (i.e., earned compensation for participating in a test).
-
When they actually received the payment for that reward.
For example, a panellist may see that they earned $20 on September 12 but have only received $10 so far. This means they are still owed $10 by the sensory facility.
In the History Page, panellists can review a breakdown of each project they participated in and how much they earned from each.
Customization and Branding
Depending on your subscription tier, you can personalize the portal to match your own style and branding. This includes selecting a top banner image, choosing a color theme, and adding extra pages such as a Contact page or FAQ page or hiding the Reward page.
To set up the portal within your system, simply email us at
support@eyequestion.nl, and our team will be happy to assist you.